SunFrog is an awesome platform for designers and artists, that allows them to upload their artworks and print them on many products including t-shirts, hoodies, sweatshirts, long-sleeve t-shirts, mugs, hats, tank tops, posters, prints, and more items.
Source: SunFrog
Getting Started On SunFrog
✅ Set up Your Account
Scroll down on your SunFrog home page and then click on the "Start An Account" button as shown on the screen below.
Source: SunFrog
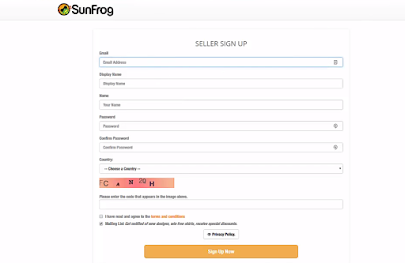
Click on the "Start Selling" button, they will take you to the signup page. Then go ahead and hit “sign up now” and fill out these fields below.
Source: SunFrog
To complete this information, you will need an email and make sure that you give them a valid email address because you will need to do the verification.
In the next step type in a quick name, set up a strong password, and choose your current country, agree to SunFrog's terms and conditions after you read them of course, and active notifications (like offers promo discounts) if you want. Then check your email address to verify your account.
✅ Add Payment Details
First login to your account which is as always located at the bottom of its page. Once you're in your account, under the “Profit” tab you will find payment details, is really important to select your information correctly because if you are in the US, there are a few extra things they require versus international users.
They have three different payment options Payoneer, PayPal and for US residents they also have direct deposit which will send you the money directly to your bank account.
If you will use PayPal or Payoneer account you will need to add address information including your phone, address, city, state, zip code.
✅ SunFrog's Dashboard
Source: SunFrog
In the “Design” tab you'll find your “Designer” which is where you'll actually go to create a design, also you will find “Manage Designs” which is where you will go to edit and change anything on any of the designs you've already uploaded including pricing, description, keywords, and so on.
The next thing is the “Share” tab which is focused on grouping designs together and tools to share on websites and blogs. Under this tab, you'll find “Collections” which allows you to build a collection of designs to market together like collections about fitness, humor, hobbies, etc. Also, you'll find “Widgets” you can build widgets to plug code into your website or blog. Then you'll find “Advanced Features” which are just things you can add to the URL to change how the page looks. So these advanced options are giving you control over the look and feel of your page.
For the “Profit” tab there is “Payment Details”, and “Current Payout” is where you'll see all of your sales that have been made. Also, you have your “Payment History” you can see all the dates and how much money was sent on that date and also how it was paid.
Finally, on the "Traffic" tab, you will see "Seller Reports" which is a breakdown of your sales views, conversion rate, and your earnings. Then you also have a "Conversion tracking" that you can add Facebook pixel, Twitter pixel, or Pinterest pixel. Next, you have "Analytics" that allows you to know the source of the traffic or sales, the case if you are running multiple ads or running traffic sources from multiple sources like a Facebook ad or an email campaign. And the last thing on this tab is "Email Export" which gives you customer information on your sales, so you can download this as a CSV file, which helps you remarketing to your customers with email marketing as an example.


0 Comments